350phi
TOYOTA GR COROLLA BRAKES
Installation for Toyota GR brake caliper on various Lexus and Toyota Applications
requirements
parts
- Front OEM 2023 Toyota GR Corolla calipers
- Front OEM 2023 Toyota GR Corolla rotors (356mm x 28mm)
- Front OEM 2023 Toyota GR Corolla brake pads and fitting kit
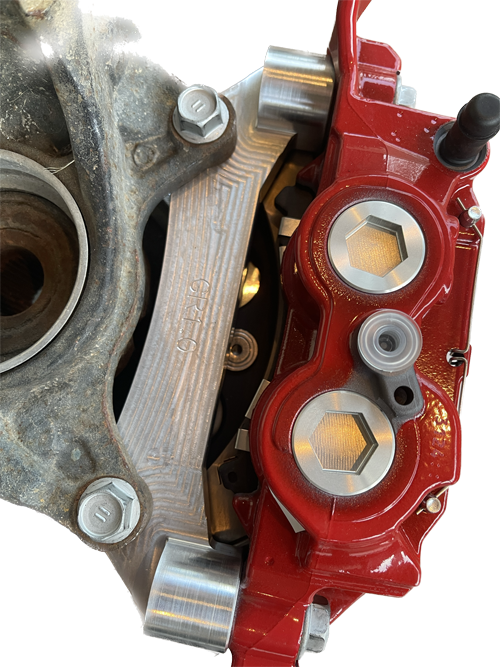
- 350phi GR1.0 bracket
Alternate rotor options
- Aftermarket/OEM 1pc steel 2013 and up Lexus GS350 F Sport front rotor RWD (356mm x 30mm)
- Aftermarket 1pc steel 2022 and up Lexus IS500 front rotor (356mm x 30mm)
Notes
- Will require modifications to front dust shield to some car
- Will require modifications to front GR rotor center bore
- Will require wheels 18" and up that can clear BBK. Use template to check
- If using Lexus front rotors, you cannot use brake shims as there's no space for them
OEM Toyota Part Numbers
- Front Left Caliper (red): 47750-52400
Front Right Caliper (red): 47730-52350 - Front Left Rotor: 43516-52020
Front Right Rotor: 43512-51280 - Front brake pad set*: 04465-52370
Fitting kit set*: 04947-52080
Front brake shims set*: 04945-52210
*a set comes in both left and right side. Order 1 QTY - Optional:
Front Left Caliper (unpainted): 47750-52420
Front Right Caliper (unpainted): 47730-52370
applicability
| Year(s) | Model(s) | Additional Information |
|---|---|---|
| 1992 - current | Toyota Camry | Bracket GR1.0 required for front. No solution for rear. |
| 2019 - current | Toyota Rav4 | Bracket GR1.0 required for front. No solution for rear. |
| 2023 - current | Toyota Prius | Bracket GR1.0 required for front. No solution for rear. |
| 2021 - 2023 | Toyota Venza | Bracket GR1.0 required for front. No solution for rear. |
| 2007 - 2019 | Lexus ES300/350 | Bracket GR1.0 required for front. No solution for rear. |
| 2010 - current | Lexus RX350*/450H*/450HL* | Bracket GR1.0 required for front. No solution for rear. |
| 2015 - current | Lexus NX250*/250T*/300*/300H*/350 */350H* | Bracket GR1.0 required for front. No solution for rear. |
| 2004 - 2020 | Toyota Sienna | Bracket GR1.0 required for front. No solution for rear. |
| 2010 - 2019 | Toyota Highlander | Bracket GR1.0 required for front. No solution for rear. | * RWD or AWD |
2012 Toyota Camry Hybrid
Information
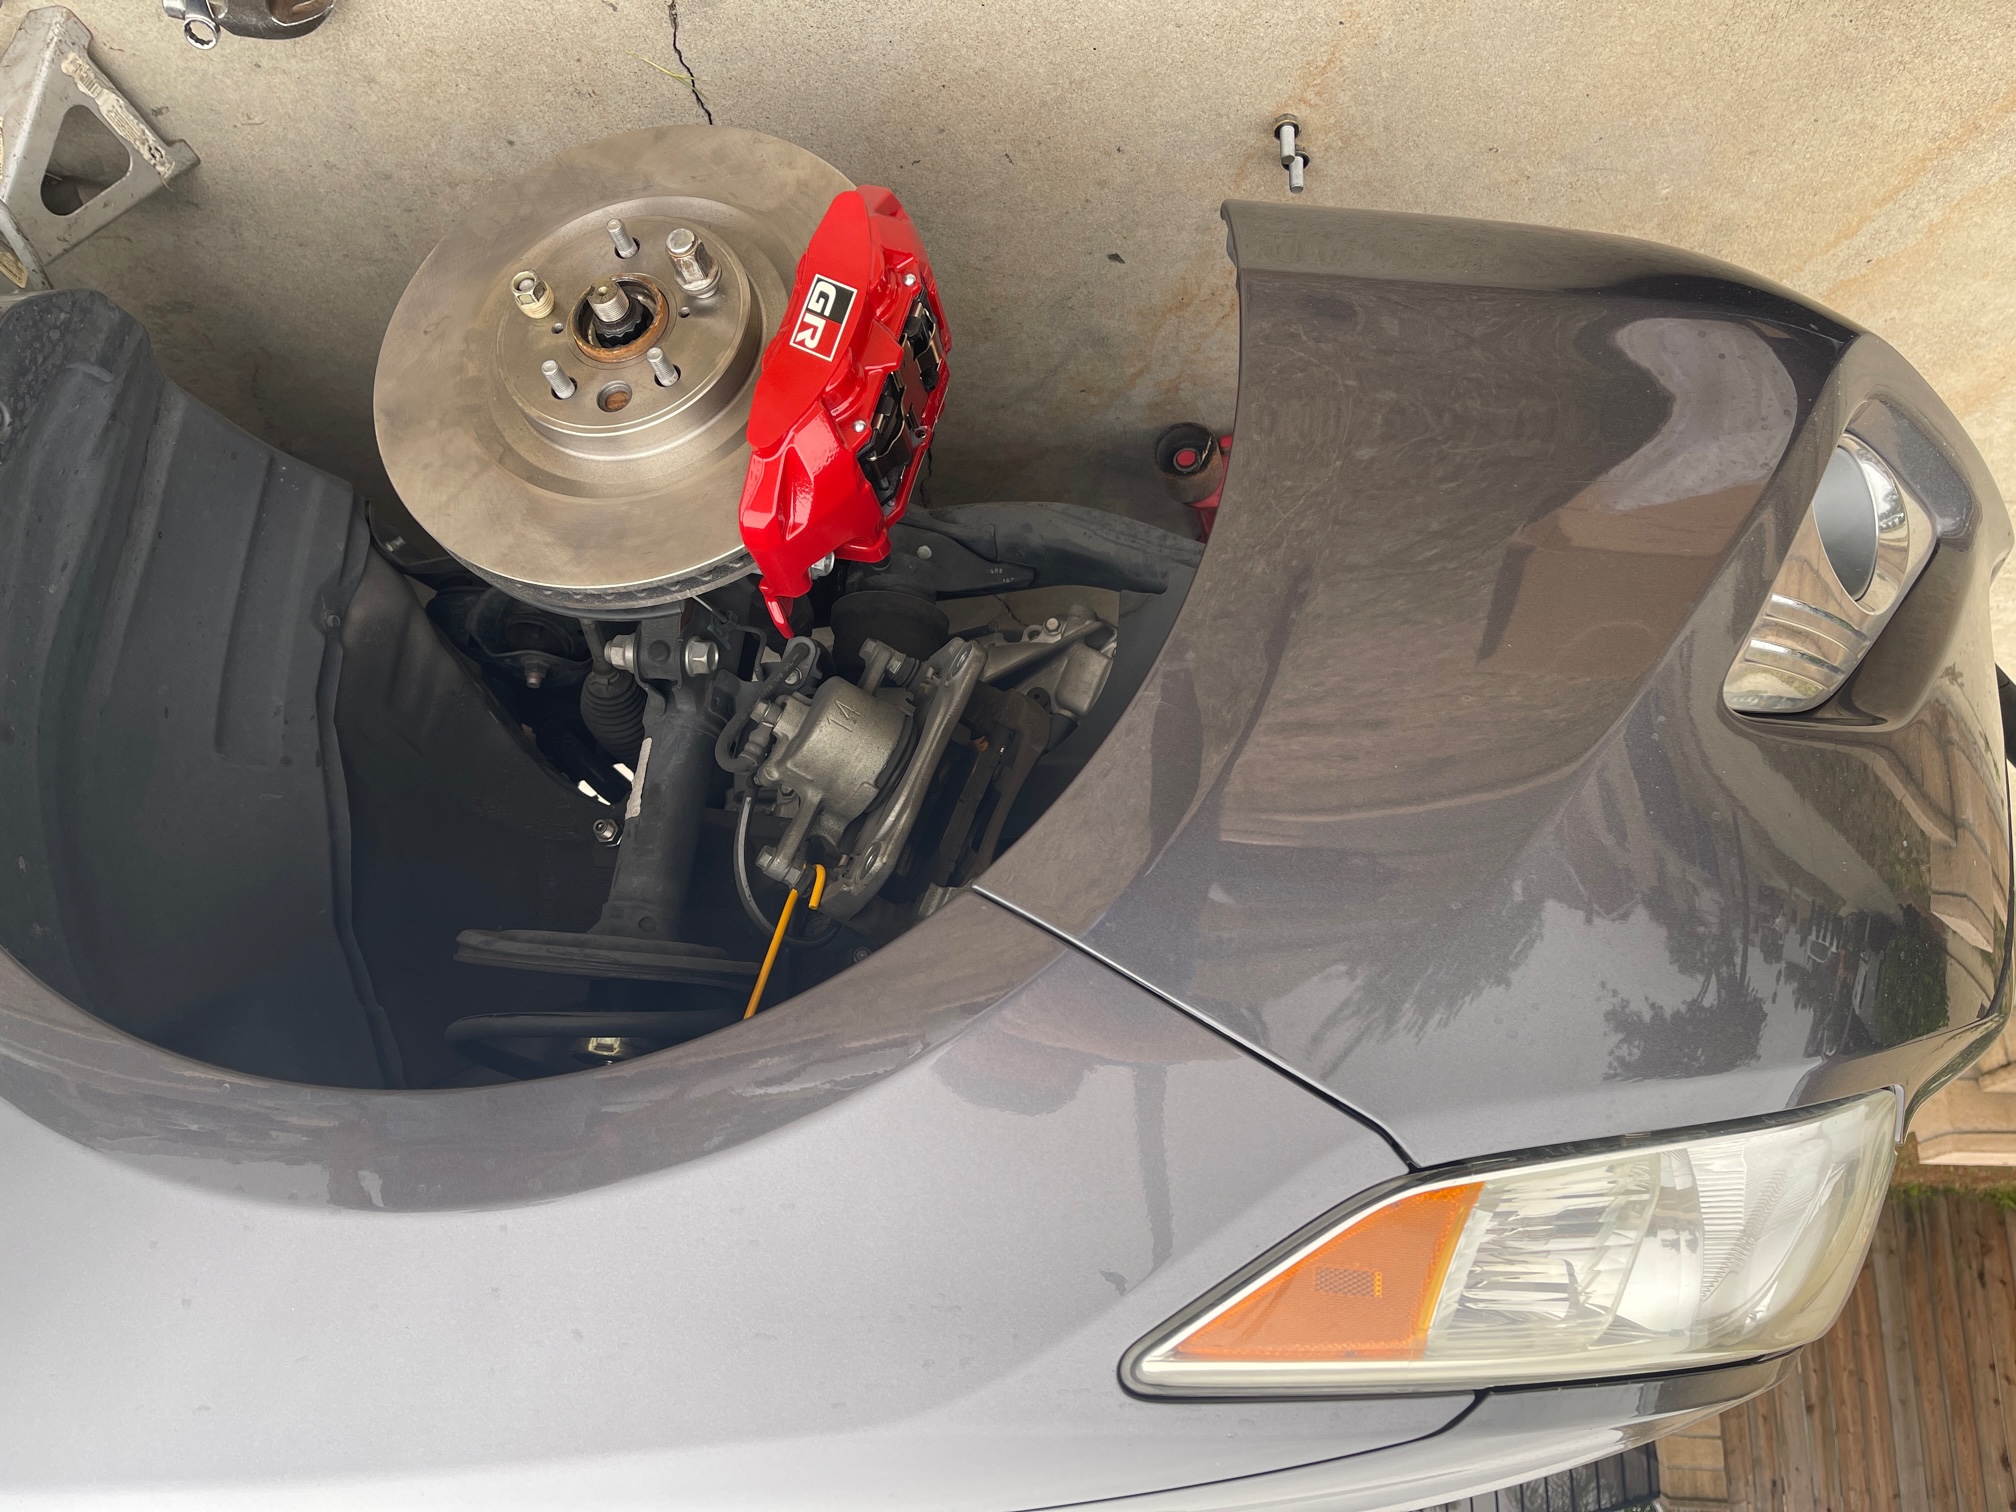
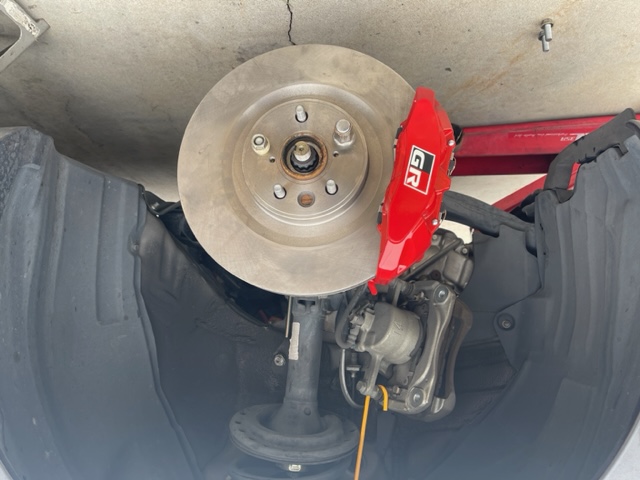 Lexus model year RX, NX, and ES have the ability to use 4 POT front Advics GR calipers onto the car. Toyota Sienna, Highlander, Camry, Rav4, C-HR, Corolla IM, Matrix, Prius, Venza and Venza also have this ability. These front calipers and rotors will be a direct bolt-on by swapping the stock caliper bracket with the 350phi GR1.0 mounting bracket.
 The only modifications needed is enlarging the GR rotor's center hub to 62mm by using a Carbide Burr rotary bit on either a straight angle grinder or a dremel tool. When grinding the opening, please be straight as possible. Take your time and rotate the bit on the inner edge of the rotor's top hat. You are only removing .1mm as the rotor comes 61.90mm large. Clean all metal shaving and make sure it can sit flat on the front hub of the car. You do not want this to be off center as it will not install correctly. Some cars will require trimming or bending of the dust shield. During the installation on our 2012 Toyota Camry, we discovered that the front dust shield needed no trimming. When installing, please check the clearance of the dust shield and trim accordingly as needed.
 Also, your stock brake lines should fit and reach the caliper. You can use the supplied M12x1.25x30 bolts with the kit or the stock OEM caliper 17mm wrench m12x1.25x30 bolts your car has.
 If you're powdercoating your calipers, please make sure that you clean and remove any layer of paint around the brake line valve. This will ensure that the crush washer to the brake lines sit flush with the caliper and does not cause any leaks.
After enlarging the rotor's top hat center bore and trimming the dust shield (if needed), you should be able to mount the caliper to your car directly with the 350phi GR1.0 brackets. Torque the 17mm caliper bolt to 79lb-ft. The rotor will line right up to the caliper like factory.
If you choose to use the Lexus rotors listed above, you cannot use the brake pad shims. those Lexus rotors are 30mm thick and there is no room for the shims to fit with the brake pad. I made that an option for a lower cost on your BBK upgrade. The Lexus rotors are easier to find and run a lot cheaper in aftermarket brand. Also, there is no need to enlarge the Lexus rotor's center bore as it's already 62mm from factory.